Unlock the Power within Your Sandisk Ultra USB 3.0: The Ultimate Guide to Removing Write Protection
Causes of SanDisk Write Protected Error
– Write protection is a security feature that prevents data on a storage device from being modified or deleted.
– The write protected error can occur due to various factors, such as a faulty USB drive, a virus infection, or issues with the registry key value.
– In some cases, the write protection error may be caused by a hardware device, like a faulty USB port or adapter.
– Formatting the storage device or using the Disk Management tool may help remove the write protection.
– Another method is using a write protection removal tool or a repair tool specifically designed for SanDisk devices.
– It’s important to ensure that the device is not locked in read-only mode, as this can also trigger the write protected error.
– Checking forums or contacting SanDisk support for further assistance can provide helpful information for resolving the issue.
Methods to Remove Write Protection from SanDisk Devices
- Check if your SanDisk device has a physical write protection switch.
- If it does, locate the switch on the side or bottom of the device.
- Toggle the switch to the opposite position to disable write protection.
Method 2: Modifying the registry settings
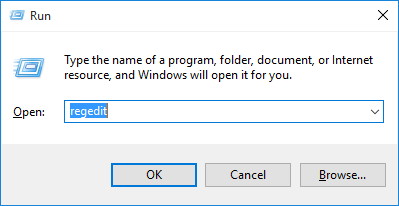
- Press Windows key + R to open the Run dialog box.
- Type regedit and press Enter to open the Registry Editor.
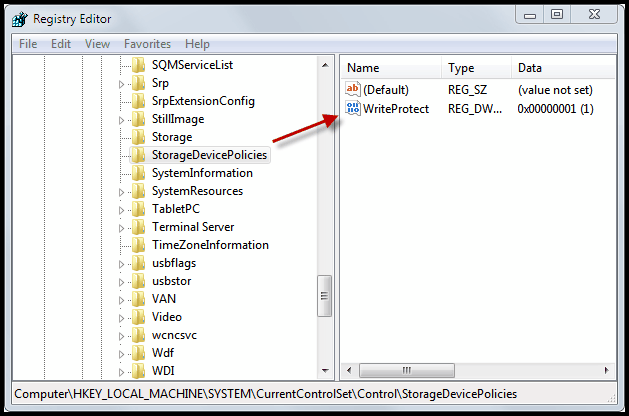
- Navigate to the following registry key: HKEY_LOCAL_MACHINESYSTEMCurrentControlSetControlStorageDevicePolicies
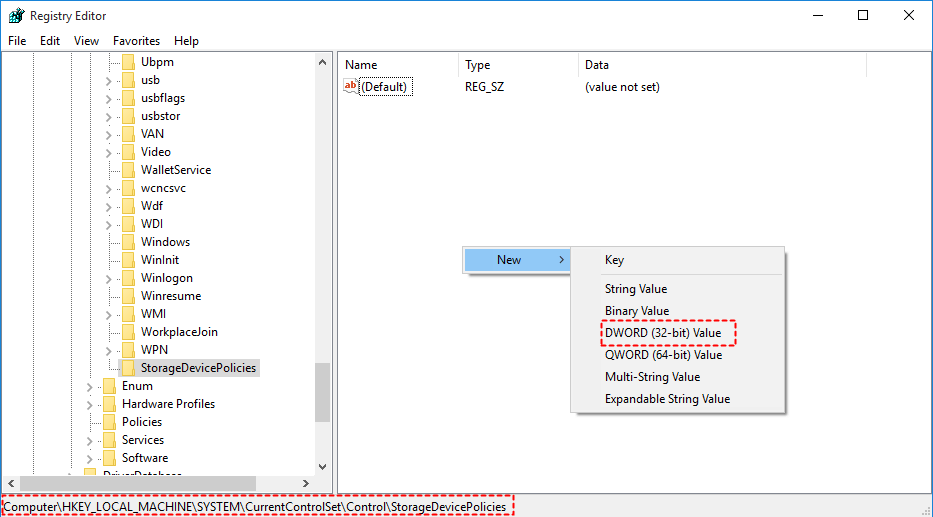
- If the WriteProtect value doesn’t exist, right-click on the StorageDevicePolicies key, select New, and then click on DWORD (32-bit) Value.
- Name the new value WriteProtect.
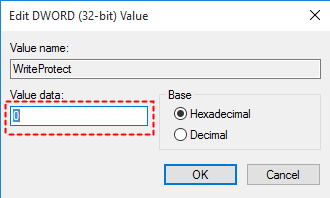
- Double-click on the WriteProtect value and set the Value data to 0.
- Click OK to save the changes and exit the Registry Editor.
Method 3: Using the Diskpart command
- Press Windows key + R to open the Run dialog box.
- Type diskpart and press Enter to open the Diskpart command prompt.
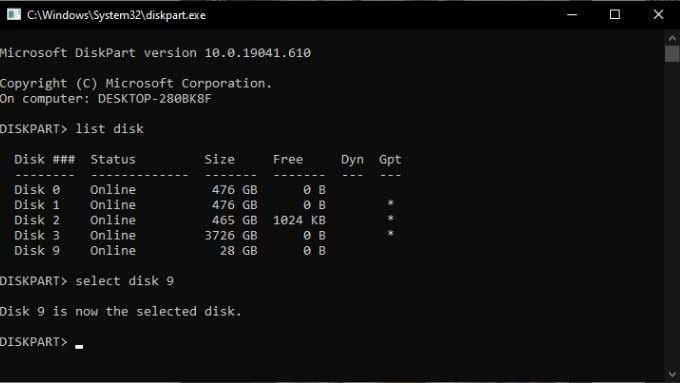
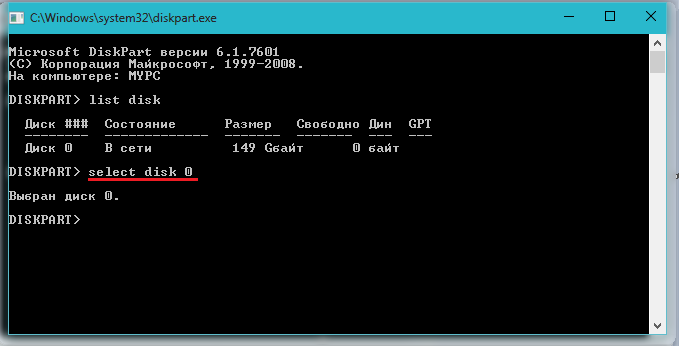
- At the Diskpart prompt, type list disk and press Enter to display a list of available disks.
- Identify the disk number of your SanDisk device.
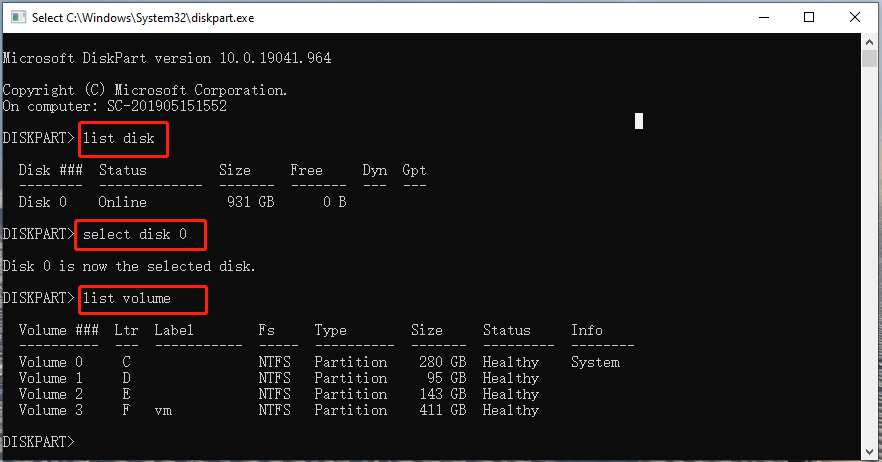
- Type select disk X (replace X with the disk number of your SanDisk device) and press Enter.
- Type attributes disk clear readonly and press Enter to remove the write protection from the SanDisk device.

- Exit the Diskpart command prompt by typing exit and pressing Enter.
Method 4: Using third-party software
- Download and install a reputable third-party write protection removal tool.
- Launch the software and follow the on-screen instructions to remove write protection from your SanDisk device.
Formatting Options for SanDisk Write Protected Devices
To remove write protection from your SanDisk Ultra USB 3.0 device, you have a few formatting options. First, you can use the built-in Disk Management tool in Windows to format the drive. Simply type “Disk Management” into the search box and open the tool. Locate your SanDisk Ultra USB 3.0 drive in the list of drives, right-click on it, and select “Format.” Follow the on-screen instructions to complete the formatting process.
If the Disk Management tool doesn’t work, you can try using a third-party format tool like SanDisk Format Tool. This tool is specifically designed for SanDisk storage devices and can help you remove write protection.
If none of these methods work, you may need to check the registry key value associated with your SanDisk Ultra USB 3.0 drive. Incorrect registry values can cause write protection issues. Please note that modifying registry values should be done with caution, as it can affect other parts of your computer.
If you’re still experiencing write protection issues, it may be a hardware-related problem. In this case, contacting SanDisk support or seeking assistance from online forums can be helpful in resolving the issue.
python

import subprocess
def toggle_write_protection(device_path, enable):
# Check if the device is mounted
mounted = subprocess.run(['mount', '-l'], capture_output=True, text=True).stdout
if device_path in mounted:
print("Device is currently mounted. Please unmount it before proceeding.")
return
# Enable or disable write protection
cmd = ['udisksctl', 'set-attribute', '-b', device_path, 'readonly', '']
if enable:
cmd[-1] = 'true' # Enable write protection
else:
cmd[-1] = 'false' # Disable write protection
result = subprocess.run(cmd, capture_output=True, text=True)
if result.returncode == 0:
print("Write protection", "enabled" if enable else "disabled", "successfully.")
else:
print("Failed to toggle write protection.")
# Usage example
device_path = '/dev/sdb'
toggle_write_protection(device_path, enable=True) # Enable write protection
Again, please note that this code assumes the availability of the `udisksctl` utility and may not work for all USB devices or operating systems. It is always recommended to consult the official documentation or support channels provided by the device manufacturer for accurate and device-specific instructions.
Common Questions about SanDisk Write Protection
- Locate the physical switch on your SanDisk Ultra USB 3.0.
- Make sure the switch is in the unlocked position.

- If the switch is already in the unlocked position, move it to the locked position and then back to the unlocked position.
Method 2: Modifying Registry Settings
- Press Win + R to open the Run dialog box.
- Type regedit and hit Enter to open the Registry Editor.
- Navigate to the following key: HKEY_LOCAL_MACHINESYSTEMCurrentControlSetControlStorageDevicePolicies.
- Check if there is a WriteProtect value present in the right-hand pane.
- If the WriteProtect value is present and set to 1, double click on it and change the value to 0.
- If the WriteProtect value is not present, right-click on an empty space in the right-hand pane, select New, then DWORD (32-bit) Value, and name it WriteProtect.
- Double click on the WriteProtect value and set the value data to 0.
- Click OK and close the Registry Editor.
Method 3: Using Diskpart Command
- Press Win + R to open the Run dialog box.
- Type diskpart and hit Enter to open the Diskpart command prompt.
- Type list disk and press Enter to see a list of currently connected disks.
- Identify the disk number associated with your SanDisk Ultra USB 3.0.
- Type select disk {disk number} (replace {disk number} with the actual disk number) and press Enter.
- Type attributes disk clear readonly and press Enter to remove the write protection.
- Close the Diskpart command prompt.
Factors Responsible for SanDisk Write Protected Issues
1. Compatibility with Windows: Some SanDisk USB flash drives may encounter write protection issues when used with certain versions of Windows, such as Windows 7 or Windows 10.
2. File System: The write protection error can also occur if the file system on the SanDisk USB drive is set to NTFS.
3. Physical Write Protect Switch: Some SanDisk USB drives and SD cards come with a physical write protect switch. If this switch is in the “locked” position, it will prevent any writing or modifying of files on the storage device.
4. Malware or Virus Infections: Viruses or malware can cause write protection issues on SanDisk drives.
5. Registry Value: A corrupted or incorrect registry value can also lead to write protection problems.
To remove write protection from your SanDisk Ultra USB 3.0 drive, follow these steps:
1. Check the physical write protect switch and ensure it is in the “unlocked” position.
2. Scan your drive for viruses or malware using a reliable antivirus program.
3. Open the Windows Registry Editor by typing “regedit” in the search box and pressing Enter.
4. Navigate to the following registry key: HKEY_LOCAL_MACHINESYSTEMCurrentControlSetControlStorageDevicePolicies
5. Double-click on the “WriteProtect” registry value and set its value data to 0.
6. Close the Registry Editor and restart your computer.
By following these steps, you should be able to remove the write protection from your SanDisk Ultra USB 3.0 drive and regain the ability to modify files on it.
Solutions for Removing Write Protection from SanDisk Devices
- Check the physical write protection switch:
- Locate the physical write protection switch on the SanDisk Ultra USB 3.0.
- Ensure that the switch is in the unlocked position.
- Modify the registry settings:
- Open the Start menu and type “regedit” in the search bar.
- Click on the Registry Editor option to open it.
- Navigate to the following path: HKEY_LOCAL_MACHINESYSTEMCurrentControlSetControlStorageDevicePolicies
- If the WriteProtect key exists, double-click on it and set the value to 0 to disable write protection.
- If the WriteProtect key does not exist, right-click on the StorageDevicePolicies folder, select New, and then choose DWORD (32-bit) Value.
- Name the new value as “WriteProtect” and set the value to 0.

- Close the Registry Editor and restart the computer.
- Use the diskpart command:
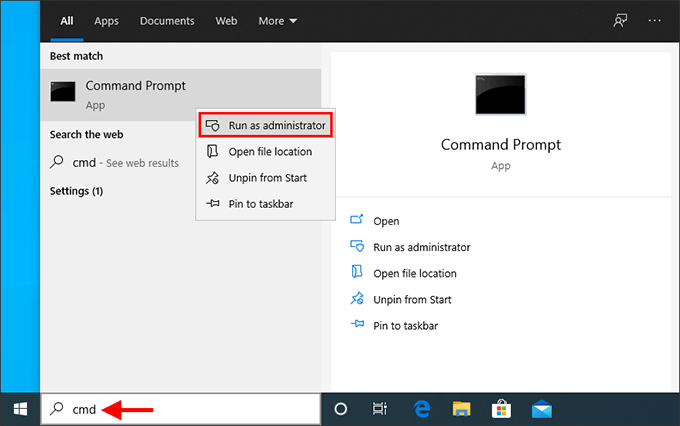
- Open the Start menu and type “cmd” in the search bar.
- Right-click on Command Prompt and select Run as administrator.
- In the Command Prompt window, type “diskpart” and press Enter.
- Type “list disk” and press Enter to display a list of connected disks.
- Identify the disk number corresponding to your SanDisk Ultra USB 3.0.
- Type “select disk X” (replace X with the disk number) and press Enter.
- Type “attributes disk clear readonly” and press Enter to remove the write protection.
- Close the Command Prompt window.
- Format the SanDisk Ultra USB 3.0:
- Connect the SanDisk Ultra USB 3.0 to the computer.
- Open File Explorer or My Computer and locate the USB drive.
- Right-click on the SanDisk Ultra USB 3.0 and select Format from the context menu.
- Choose the desired file system (e.g., FAT32 or NTFS) and click on Start to begin the formatting process.
- Wait for the formatting to complete and then close the formatting window.
Removing Write Protection from USB Pen Drive on Mac
To remove write protection from your SanDisk Ultra USB 3.0 pen drive on a Mac, follow these steps:
1. Connect the USB pen drive to your Mac.
2. Open a new Finder window.
3. Locate the USB pen drive in the sidebar under “Devices.”
4. Right-click on the pen drive and select “Get Info.”
5. In the Info window, scroll down to the “Sharing & Permissions” section.
6. Click on the lock icon and enter your administrator password to make changes.
7. Click on the “+” button to add yourself as a user with read and write privileges.
8. Close the Info window.
9. Eject the USB pen drive by dragging it to the trash or right-clicking and selecting “Eject.”
Your SanDisk Ultra USB 3.0 pen drive should now be writeable on your Mac. If you continue to experience issues with write protection, try using a different USB port or consult SanDisk’s support page for further assistance.
