Welcome to the ultimate guide on how to fix the nagging “BOOTMGR Is Compressed Error” in Windows 7/10/8, without the need for a CD. Discover the simplest solutions to overcome this frustrating issue and get your system back on track seamlessly.
Symptoms and Description of “Bootmgr is Compressed”
When you encounter the “Bootmgr is Compressed” error on your Windows 7/10/8 computer, it means that the boot manager file responsible for loading the operating system cannot be accessed due to compression. This can happen if the bootmgr file is accidentally compressed, causing your computer to fail to start properly.
To fix this error without using a CD, follow these steps:
1. Restart your computer and press the Ctrl + Alt + Delete keys simultaneously to access the BIOS settings.
2. In the BIOS, navigate to the “Boot” or “Startup” section.
3. Set your hard drive as the first boot device.
4. Save the changes and exit the BIOS.
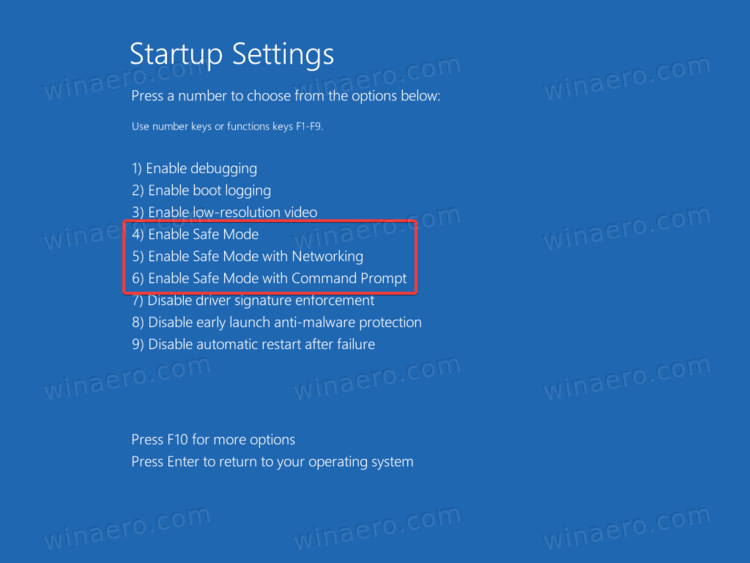
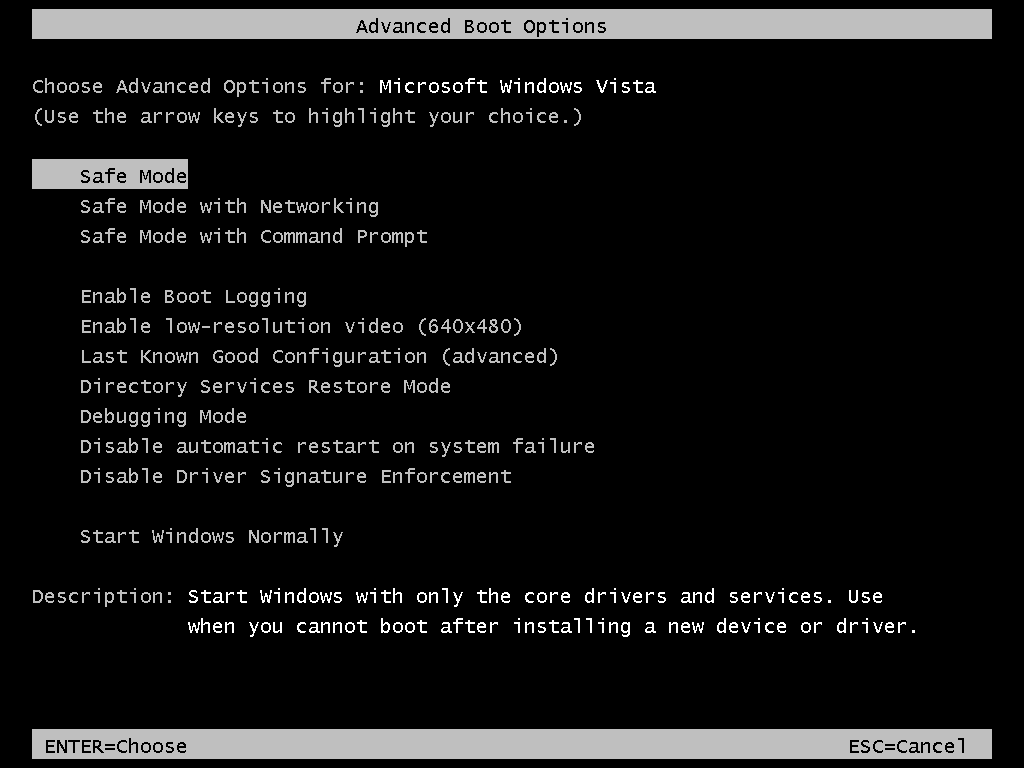
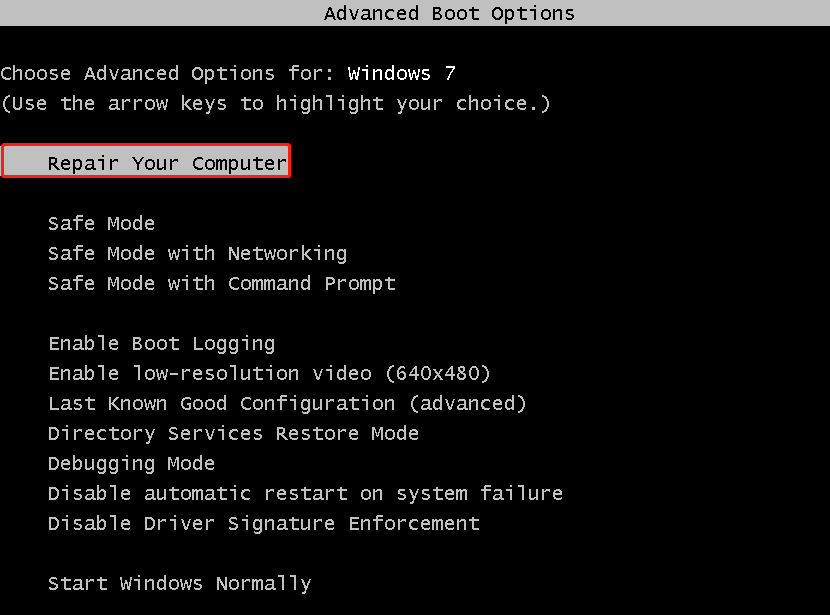
5. Restart your computer and press the F8 key repeatedly to access the Advanced Boot Options menu.
6. Select “Repair Your Computer” and press Enter.
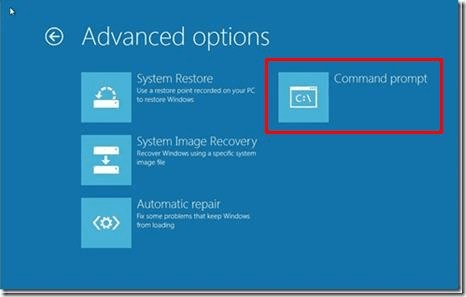
7. In the System Recovery Options, choose “Command Prompt”.
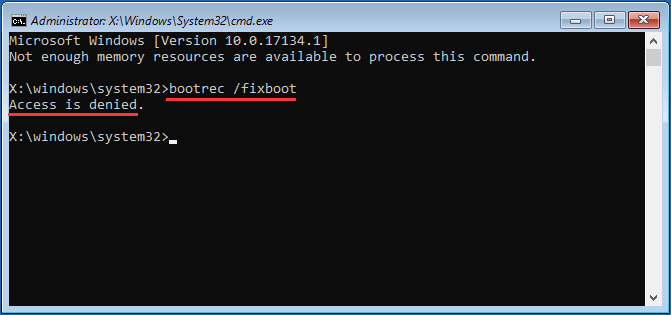
8. Type the following command and press Enter: bootrec /fixboot
9. Restart your computer and check if the error is resolved.
By following these steps, you can fix the “Bootmgr is Compressed” error and get your computer up and running again without the need for a CD or external installation media.
Causes of the “Bootmgr is Compressed” Error
1. Accidental Compression: If the “bootmgr” file on your hard drive gets compressed, it can cause this error. Avoid compressing system files to prevent this issue.
2. Software Bugs or Glitches: Sometimes, software bugs or glitches can lead to the compression of the “bootmgr” file. Ensure that your operating system and software are up to date to minimize such errors.
3. Incorrect Disk Partitioning: Improper disk partitioning can also result in the “Bootmgr is Compressed” error. Use disk management tools like EasyBCD to fix partitioning issues.
4. Malware or Virus Infection: Malware or virus infections can corrupt system files, including the “bootmgr” file. Run a thorough antivirus scan to remove any potential threats.
5. Windows Setup or Installation: Errors during the Windows setup or installation process can compress the “bootmgr” file. Use a reliable installation method and follow proper guidelines.
Remember to back up your important data before attempting any fixes. Use the Windows Recovery Environment or a bootable USB drive to access recovery options.
To fix the “Bootmgr is Compressed” error:
1. Start your computer and press the appropriate key to enter the boot menu.
2. Choose the option to boot from a USB or DVD.
3. Select the “Repair your computer” option.
4. Open the command prompt.
5. Type bootrec /fixboot and press Enter.
6. Type bootrec /fixmbr and press Enter.
7. Restart your computer and check if the error is resolved.
If the error persists, seek further assistance from Microsoft support or a professional technician.
Easy Recovery Methods to Rebuild BOOTMGR
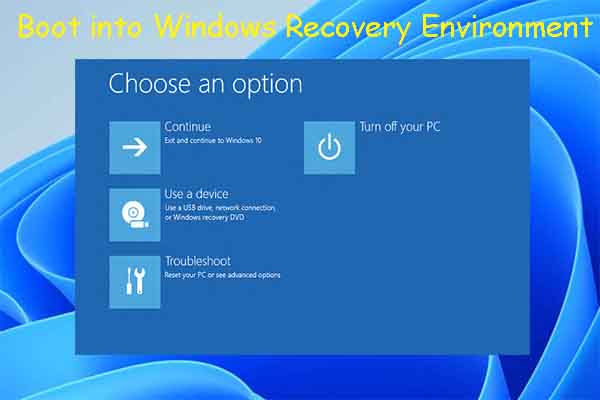
- Boot into the Windows Recovery Environment by restarting your computer and pressing the appropriate key (usually F8 or F12) to access the boot menu.
- Select the “Repair your computer” option to enter the recovery environment.
- Choose “Command Prompt” from the available options.
- Type the command “bootrec /fixboot” and press Enter to rebuild the BOOTMGR file.
- Once the process is complete, restart your computer and check if the BOOTMGR is compressed error has been resolved.
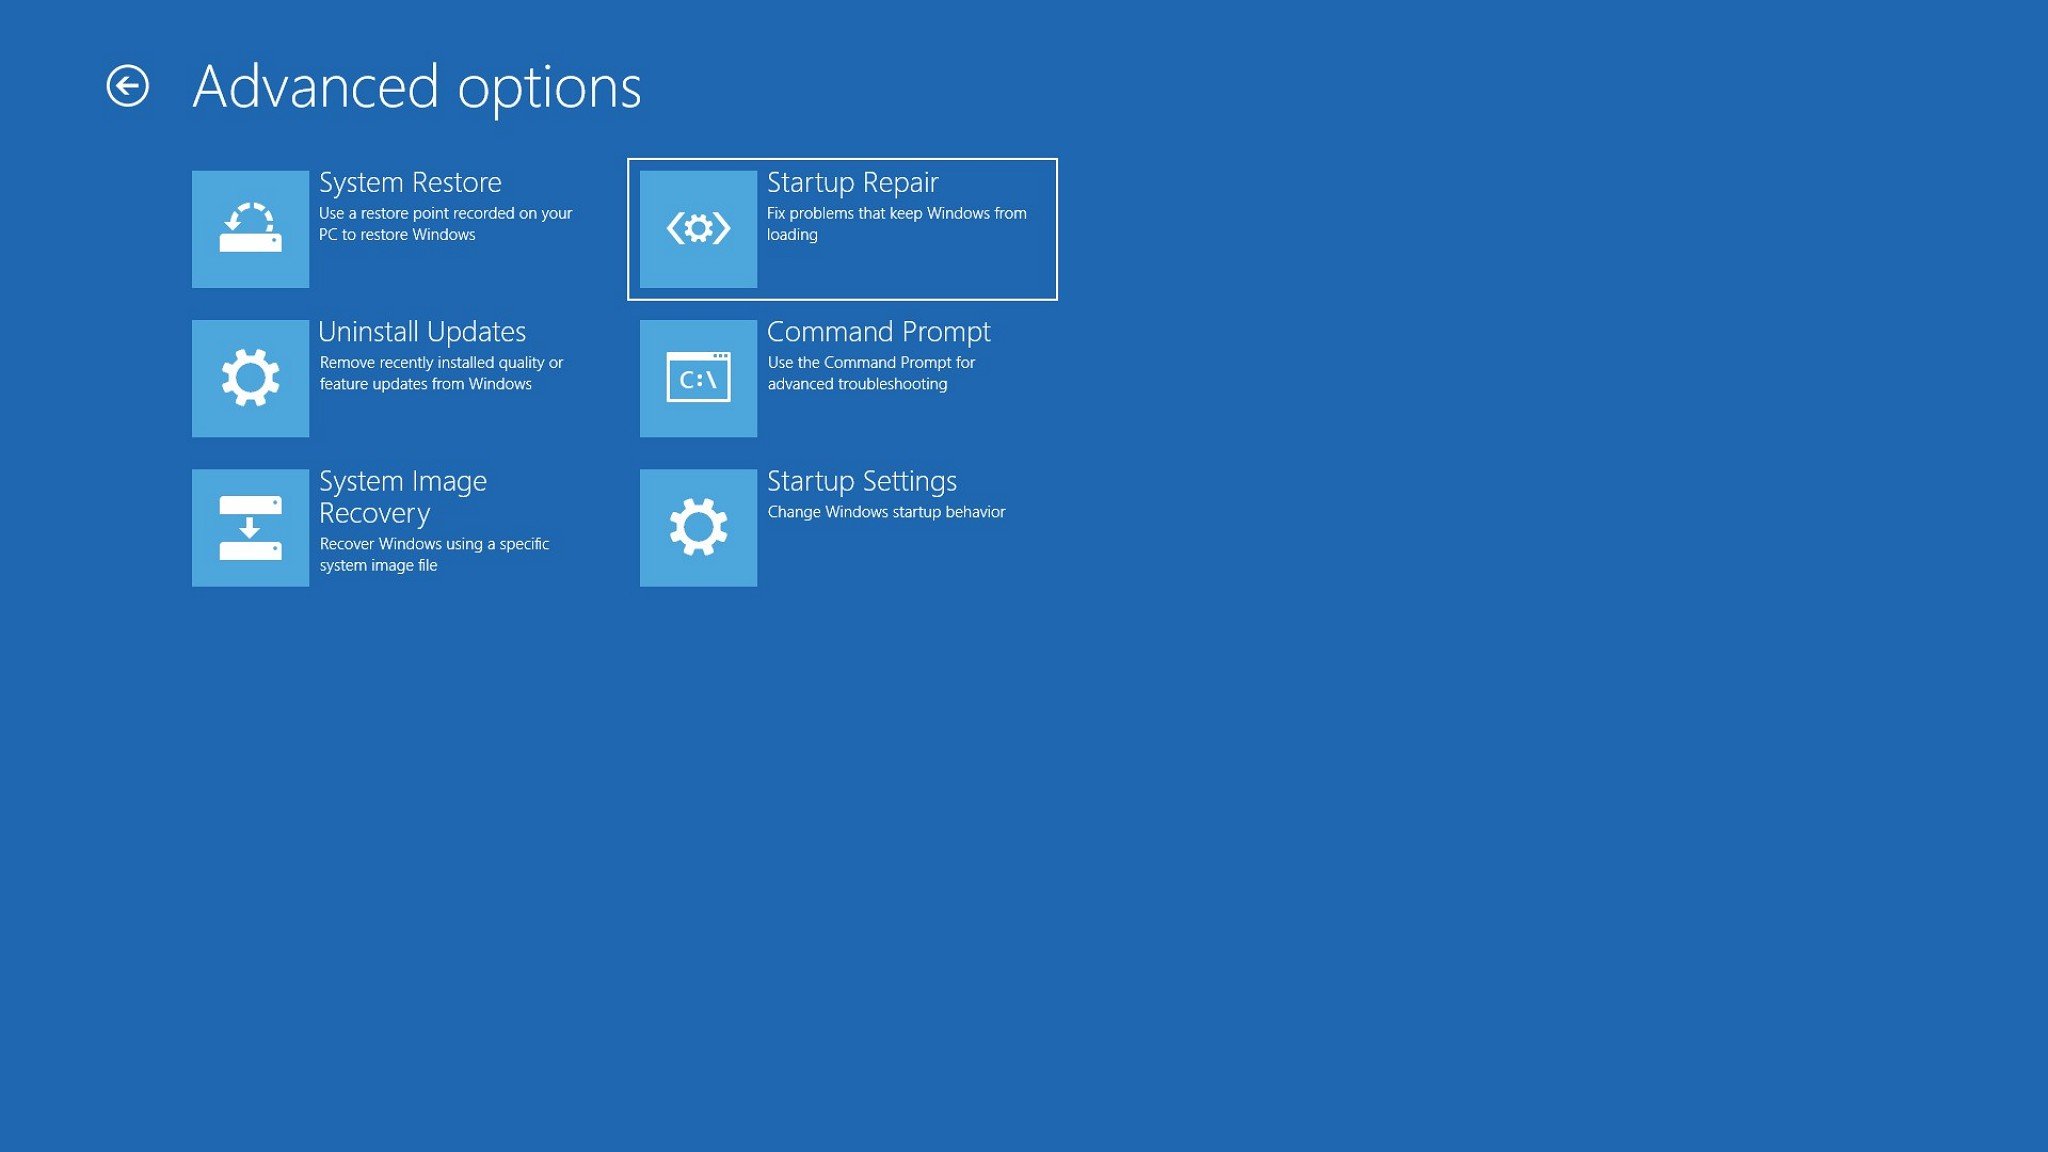
Repair Step 2: Use Startup Repair
- Boot into the Windows Recovery Environment using the same method as in Repair Step 1.
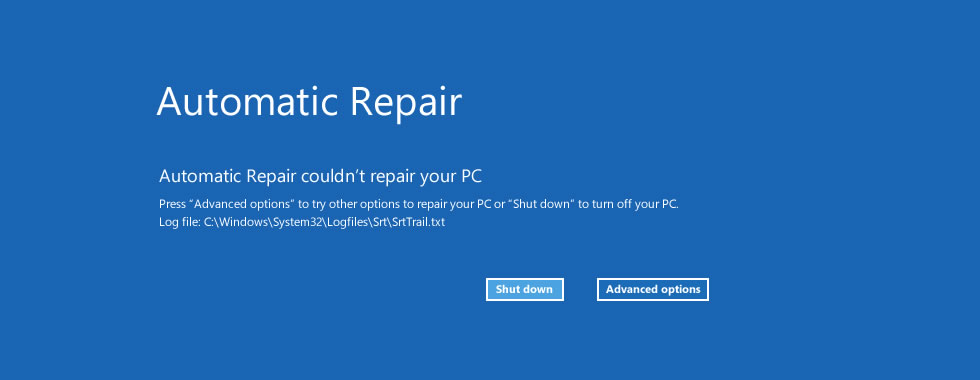
- Select the “Startup Repair” option to begin the automated repair process.
- Wait for the repair process to complete. This may take some time.
- Restart your computer and check if the BOOTMGR is compressed error has been resolved.
Repair Step 3: Rebuild BCD
- Boot into the Windows Recovery Environment as explained in Repair Step 1.
- Choose the “Command Prompt” option.
- Type the command “bootrec /rebuildbcd” and press Enter.
- If prompted, select the Windows installation you want to repair.
- Wait for the process to complete, then restart your computer and check if the BOOTMGR is compressed error has been resolved.
Repair Step 4: Manually Replace BOOTMGR File
- Boot your computer using a Windows installation media (USB or DVD).
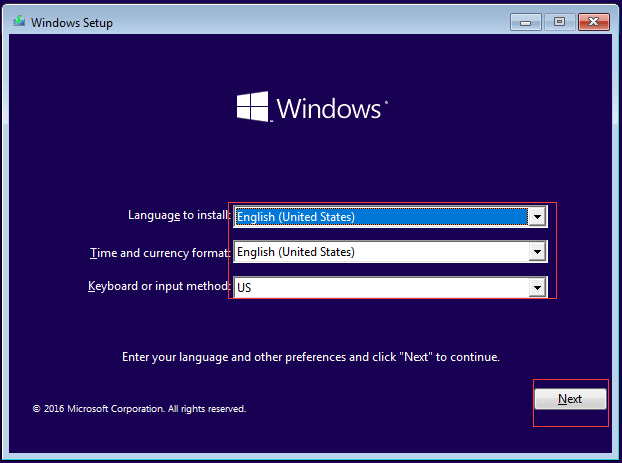
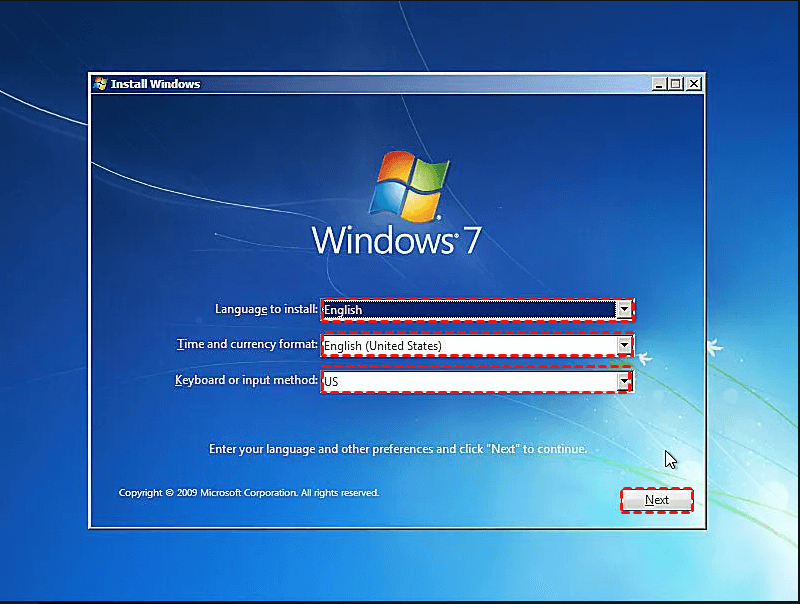
- Select your language preferences and click “Next”.
- Click “Repair your computer” and select the appropriate Windows installation.
- Choose “Command Prompt” from the options.
- Enter the command “attrib -c c:bootmgr” to remove the compression attribute from the BOOTMGR file.
- Type “copy d:bootmgr c:” (replace “d” with the drive letter of your Windows installation media) to manually replace the BOOTMGR file.
- Restart your computer and check if the BOOTMGR is compressed error has been resolved.
Using Startup Repair to Fix BOOTMGR
1. Start your computer and insert a Windows installation CD or USB flash drive.
2. Press any key to boot from the CD or USB.
3. Select your language preferences and click “Next.”
4. Click on “Repair your computer” at the bottom left corner.
5. Select “Troubleshoot” and then “Advanced options.”
6. Choose “Startup Repair” and wait for the process to complete.
7. Restart your computer and check if the BOOTMGR error is resolved.
If you don’t have a CD or USB:
1. Restart your computer and press F8 repeatedly until the Advanced Boot Options menu appears.
2. Select “Repair your computer” and press Enter.
3. Choose your language preferences and click “Next.”
4. Click on “Startup Repair” and wait for the process to finish.
5. Restart your computer and check if the error is fixed.
Using Startup Repair can help resolve BOOTMGR errors without the need for a CD or USB.
Unchecking “Compress this Drive” to Resolve the Error
To resolve the “BOOTMGR Is Compressed” error in Windows 7/10/8 without a CD, follow these steps:
1. Start your computer and press the Ctrl + Alt + Delete buttons simultaneously.
2. This will restart your computer and take you to the Windows Boot Manager screen.
3. Select the Windows Recovery Environment option.
4. In the recovery environment, click on Command Prompt to open the command-line interface.
5. Type the following command and press Enter: compact /U C:bootmgr
6. This command will uncompress the BOOTMGR file.
7. Restart your computer and the “BOOTMGR Is Compressed” error should be resolved.
Remember to replace “C:” with the appropriate drive letter if your Windows installation is located on a different drive.
These steps should help you fix the error and boot your Windows system successfully.
Manual Update of BOOTMGR
To manually update BOOTMGR in Windows 7/10/8 without a CD, follow these steps:
1. Start your computer and press **Ctrl+Alt+Delete** to restart.
2. When the computer restarts, you may see an error message that says “BOOTMGR is missing” or “BOOTMGR is compressed.”
3. To fix this error, you need to create a bootable USB flash drive with the necessary files. Download the Windows installation files from the Microsoft website or use a Windows installation disc if you have one.
4. Once you have the installation files, insert your USB flash drive and open **Command Prompt** as an administrator.
5. In Command Prompt, navigate to the root directory of your USB flash drive using the **cd** command. For example, if your USB drive is assigned the letter “E,” type **cd E:** and press Enter.
6. Next, type the following command and press Enter: **bootsect /nt60 E:** (replace “E” with the drive letter of your USB flash drive).
7. This command will update the boot sector of your USB flash drive.
8. Copy all the installation files from the Windows installation disc or downloaded ISO file to your USB flash drive.
9. Safely eject the USB flash drive from your computer and insert it into the computer where you’re experiencing the BOOTMGR error.
10. Restart your computer and press the key to access the boot menu (usually F12 or Esc).
11. From the boot menu, select your USB flash drive as the boot device and press Enter.
12. Follow the on-screen instructions to repair your Windows installation.
13. Once the repair process is complete, remove the USB flash drive and restart your computer.
14. Your computer should now boot up without the BOOTMGR error.
By following these steps, you can manually update BOOTMGR and fix the “BOOTMGR is compressed” error in Windows 7/10/8 without using a CD.
Repairing “BOOTMGR is Compressed” with Windows Installation DVD
To fix the “BOOTMGR is Compressed” error in Windows 7/10/8 without a CD, you can use a Windows Installation DVD.
1. Start by inserting the Windows Installation DVD into your computer’s optical drive.
2. Restart your computer and boot from the DVD. This may require changing the boot order in your computer’s BIOS settings.
3. Once the Windows Preinstallation Environment loads, select your language preferences and click “Next.”
4. Click on “Repair your computer” at the bottom left corner of the screen.
5. Select the operating system you want to repair (e.g., Windows 7, Windows 10, Windows 8) and click “Next.”
6. In the System Recovery Options, click on “Command Prompt.”
7. In the Command Prompt window, type “compact /U C:bootmgr” and press Enter. This will decompress the BOOTMGR file.
8. Restart your computer and remove the Windows Installation DVD. The “BOOTMGR is Compressed” error should be resolved.
Remember to ensure the correct drive letter assignment for your system. If you encounter any issues, it’s recommended to seek further assistance or consult Microsoft’s troubleshooting resources.
Recovering Lost Data When Unable to Boot Computer
If you are unable to boot your computer due to the “BOOTMGR Is Compressed” error in Windows 7/10/8 and don’t have a CD, there is still a solution. Follow these steps to recover your lost data:
1. Start by creating a Windows Preinstallation Environment (PE) on a USB drive.
2. Download an optical disc image of Windows 7/10/8 and save it to your computer.
3. Use a tool like EasyBCD to create a bootable USB drive using the Windows PE and the disc image.
4. Insert the USB drive into your computer and boot from it.
5. When prompted, select your preferred language and keyboard layout.
6. Click on “Repair your computer” and choose “Troubleshoot.”
7. Open the Command Prompt and type in the following command: compact /u /a /s C:*
8. Press Enter to decompress all files on the C drive.
9. Restart your computer and remove the USB drive.
10. Your computer should now be able to boot normally without the “BOOTMGR Is Compressed” error.
Remember to back up your data regularly to avoid any future issues.
Additional Resources and Articles on the Topic
- Start your computer and press F8 repeatedly until you see the Advanced Boot Options menu.
- Select Repair Your Computer and press Enter.
- Choose your preferred language and click Next.
- Enter your login credentials and click OK.
- Click on Command Prompt.
- Type bootrec /fixboot and press Enter.
- Type bootrec /scanos and press Enter.
- Type bootrec /rebuildbcd and press Enter.
- Restart your computer and check if the BOOTMGR is compressed error is resolved.
Method 2: Use the Automatic Repair
- Start your computer and press F8 repeatedly until you see the Advanced Boot Options menu.
- Select Repair Your Computer and press Enter.
- Choose your preferred language and click Next.
- Enter your login credentials and click OK.
- Click on Startup Repair.
- Wait for the automatic repair process to complete.
- Restart your computer and check if the BOOTMGR is compressed error is resolved.
Method 3: Use a Windows Installation USB/DVD
- Insert the Windows Installation USB or DVD into your computer.
- Restart your computer and press any key to boot from the USB or DVD.
- Select your preferred language and click Next.
- Click on Repair your computer.
- Choose your operating system and click Next.
- Click on Command Prompt.
- Type bootrec /fixboot and press Enter.
- Type bootrec /scanos and press Enter.
- Type bootrec /rebuildbcd and press Enter.
- Restart your computer and check if the BOOTMGR is compressed error is resolved.
Method 4: Use a Third-Party Bootable Disk
- Create a bootable disk using a third-party software.
- Insert the bootable disk into your computer.
- Restart your computer and boot from the bootable disk.
- Follow the on-screen instructions to repair the BOOTMGR is compressed error.
- Restart your computer and check if the issue is resolved.