Having trouble saying goodbye to your external drive on Windows 10? Fear not, as we delve into the realm of troubleshooting to bid farewell to this common issue. Let’s explore the solutions that will help you gracefully eject your external drive without any hiccups!
Troubleshooting methods to eject external drives on Windows 10
1. Check for background processes: Press Ctrl + Shift + Esc to open Task Manager. Look for any processes that might be using the external drive and end them.
2. Use Windows Explorer: Right-click on the external drive in Windows Explorer and select “Eject.” If an error message appears, proceed to the next method.
3. Use Disk Management: Press Windows key + X and select “Disk Management.” Right-click on the external drive and select “Eject.” If the issue persists, try the next method.
4. Use Device Manager: Press Windows key + X and select “Device Manager.” Expand the “Disk drives” section, right-click on the external drive, and select “Disable.” After a few seconds, right-click again and select “Enable.”
5. Use Process Explorer: Download and run Process Explorer from Microsoft’s website. Look for any processes associated with the external drive, right-click on them, and select “Kill Process.”
Remember to safely remove hardware by clicking on the “Safely remove hardware” icon in the taskbar before physically disconnecting the external drive.
Restarting your computer to fix ejecting issues
If you’re experiencing issues ejecting your external drive on Windows 10, restarting your computer can often resolve the problem. This simple solution can help fix any background processes or system errors that may be causing the inability to eject your USB drive properly.
To restart your computer, follow these steps:
1. Save and close any open files or programs.
2. Click on the “Start” button in the bottom-left corner of your taskbar.
3. Select the “Power” option.
4. Choose “Restart” from the drop-down menu.
5. Wait for your computer to shut down and restart.
Once your machine has restarted, try ejecting your USB drive again. If you still encounter the “Problem Ejecting USB Mass Storage Device” alert, you may need to explore other troubleshooting methods. However, restarting your computer is often the best first step to fix ejecting issues.
Using the Windows hardware and devices troubleshooter
To troubleshoot the issue of being unable to eject an external drive on Windows 10, you can use the Windows hardware and devices troubleshooter. Here’s how:
1. Press the Windows key + I to open the Settings app.
2. Click on “Update & Security” and then select “Troubleshoot” from the left-hand menu.
3. Scroll down and click on “Hardware and Devices” troubleshooter.
4. Click on “Run the troubleshooter” and follow the on-screen instructions.
5. The troubleshooter will scan your system for any hardware-related issues and attempt to fix them automatically.
If the troubleshooter doesn’t resolve the problem, you can try these additional steps:
– Open Task Manager by pressing Ctrl + Shift + Esc.
– Look for any background processes related to the external drive or USB drivers and end them.
– Check the Event Viewer for any related errors or warnings. Look for Event ID 225, which indicates a problem ejecting a USB mass storage device.
– Make sure you’ve closed all files and applications that might be using the external drive.
– If none of these solutions work, it’s best to contact the device manufacturer for further assistance.
Remember to always safely eject your external drive to prevent data loss or damage to the device.
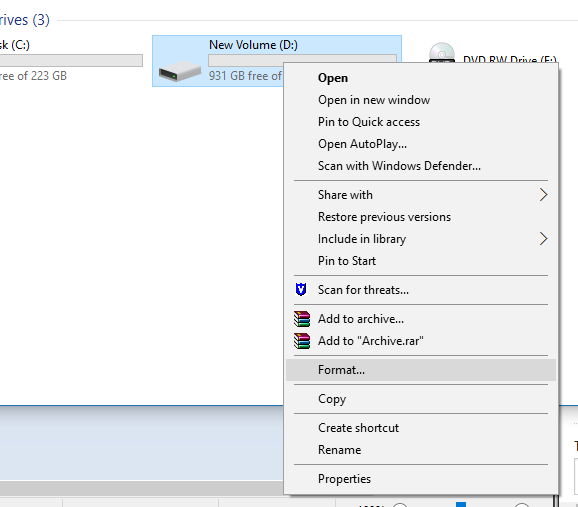
Ejecting the drive using disk manager
To eject an external drive using Disk Manager in Windows 10, follow these steps:
1. Press the Windows key + X and select “Disk Management” from the menu.
2. Locate your external drive in the list of disks displayed.
3. Right-click on the disk and select “Eject” from the context menu.
4. Wait for the process to complete and ensure that there are no error messages or alerts.
5. Once ejected, you can safely disconnect the external drive from your computer.
If you encounter any issues or error messages while ejecting the drive, try the following fixes:
– Update your USB drivers to the latest version.
– Check the Event Viewer for any related Event IDs that may indicate a problem.
– Close any background processes or applications that may be using the drive.
– Make sure no files or folders on the drive are in use.
– Restart your machine and try ejecting the drive again.
Remember to always eject external drives properly to avoid data loss and prevent any potential damage to the drive.
Updating USB drivers to resolve ejecting problems
To troubleshoot Windows 10’s inability to eject an external drive, updating USB drivers can often resolve the issue. Follow these steps to fix the problem:
1. Press the Windows key + X and select “Device Manager” from the options.
2. In the Device Manager window, expand the “Universal Serial Bus controllers” section.
3. Locate and right-click on the USB driver associated with the external drive.
4. Choose “Update driver” from the context menu.
5. Select “Search automatically for windows-10-usb-mouse-stops-working/” title=”Windows 10 USB Mouse Stops Working [11 Best Fixes]”>updated driver software” and let Windows find and install the latest driver.
6. Once the update is complete, restart your computer.
7. After rebooting, try ejecting the external drive again.
Note: If updating the USB driver doesn’t resolve the issue, there may be another reason causing the problem. Try other solutions, such as closing any background processes using the drive or using the “Safely Remove Hardware” feature. Additionally, make sure no programs or files are actively using the drive before attempting to eject it.
Ending tasks in task manager to safely eject the drive
To safely eject your external drive in Windows 10, you can end tasks in Task Manager.
First, open Task Manager by pressing Ctrl + Shift + Esc.
Next, go to the “Processes” tab and look for any processes related to your external drive. These processes may have names like “usbstor.exe” or “usbhub.sys”.
Once you’ve identified the relevant processes, right-click on them and select “End Task” to stop them.
After ending the tasks, you can safely eject your drive without any issues.
Remember to always wait for any file transfers or background processes to complete before ejecting the drive.
By following these steps, you can avoid any potential data loss or damage to your external drive.
If you continue to experience issues with ejecting your drive, make sure to check for any device driver updates or try using a different USB port on your laptop.
Safely removing an external hard drive
- Ensure data integrity: Safely removing an external hard drive helps prevent data corruption and ensures the integrity of your files.
- Close any open files or applications that may be using the external drive. This will ensure all data is written to the drive before ejecting it.
- Locate the “Safely Remove Hardware and Eject Media” icon in the system tray or notification area of your Windows 10 taskbar.
- Click on the “Safely Remove Hardware and Eject Media” icon to open the device menu.
- From the device menu, select the external hard drive you wish to eject.
- Wait for Windows to prepare the drive for ejection. This may take a few moments.
- Once the drive is prepared, a notification will appear indicating that it is safe to remove the external hard drive.
- Physically disconnect the external hard drive from your computer by gently unplugging the USB or Thunderbolt cable.
- Store your external hard drive in a safe place to protect it from damage or accidental data loss.
