Welcome to our comprehensive guide on resolving the frustrating issue of a non-responsive USB mouse in Windows 10. In this article, we present you with 11 effective fixes that will help you regain control and get your mouse back in action. So, let’s dive in and explore the solutions to this common Windows 10 problem!
Troubleshooting USB Mouse Issues on Windows 10
1. Check USB Ports: Ensure the USB mouse is properly connected to a working USB port. Try connecting to a different port or using a different USB cable to rule out any issues with the port or cable.
2. Restart Your Computer: Sometimes a simple restart can resolve USB mouse problems. Save your work, close all programs, and restart your computer.
3. Update Mouse Drivers: Outdated or incompatible mouse drivers can cause issues. Right-click the Start Menu, select Device Manager, expand Mice and other pointing devices, right-click your USB mouse, and select Update driver.
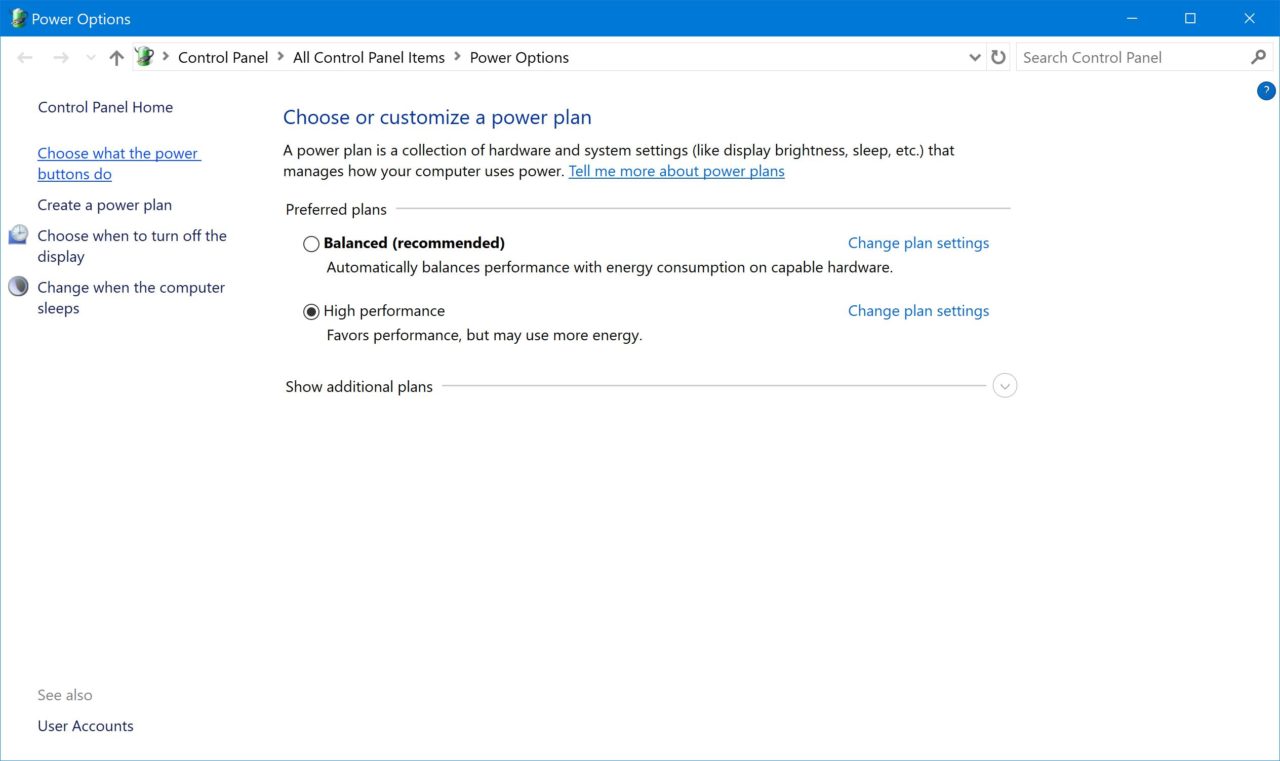
4. Check Power Options: Adjust power options to prevent USB devices from being turned off to save power. Press Windows key + X, select Power Options, click on Change plan settings, then Change advanced power settings. Expand USB settings and disable USB selective suspend setting.
5. Check BIOS Settings: Some BIOS settings can interfere with USB devices. Restart your computer and enter the BIOS setup by pressing a specific key (usually F2 or Del). Look for USB settings and enable them if necessary.
6. Try a Different Mouse: If possible, try using a different USB mouse to see if the issue persists. This will help determine if the problem lies with the mouse or the computer.
7. Check for Hardware Issues: Inspect the USB mouse for any physical damage or loose connections. If needed, try using the mouse on another computer to confirm if it’s a hardware issue.
8. Run Hardware and Device Troubleshooter: Press Windows key + I, select Update & Security, click on Troubleshoot, and run the Hardware and Devices troubleshooter to automatically detect and fix any issues.
9. Reinstall USB Mouse Driver: Right-click the Start Menu, select Device Manager, expand Mice and other pointing devices, right-click your USB mouse, and select Uninstall device. Restart your computer, and Windows will automatically reinstall the mouse driver.
10. Perform a System Restore: If the USB mouse issue started recently, performing a system restore can revert your computer to a previous state when the mouse was working correctly.
11. Contact Support: If all else fails, reach out to the manufacturer’s support team or Microsoft support for further assistance.
Remember, troubleshooting steps may vary depending on the specific USB mouse model and Windows 10 version you are using.
Checking Power Source and Hardware Damage
1. Ensure that your mouse is properly connected to the computer via a USB port.
2. Check if the USB port is functioning by connecting another USB device to it.
3. If the mouse is wireless, make sure the batteries are not dead or try replacing them.
4. Inspect the USB cable for any visible damage or fraying.
5. Verify that the mouse is recognized by the computer by going to the Start Menu, typing “Device Manager,” and opening it. Look for any yellow exclamation marks or error messages next to the mouse device.
6. Update or reinstall the USB mouse driver.
7. Restart your computer and try using the mouse again.
8. If the issue persists, try connecting the mouse to a different USB port.
9. Check your computer’s BIOS settings to ensure that the USB ports are enabled.
10. Consider trying a different mouse to determine if the problem lies with the mouse itself.
11. If all else fails, consult a professional or contact the manufacturer for further assistance.
Reconnecting the USB Mouse
If your USB mouse stops working on Windows 10, there are several fixes you can try.
1. First, check if the mouse is properly connected to the USB port. Unplug and reattach the mouse to ensure a secure connection.
2. Restart your PC. This can help resolve any temporary software or hardware issues that may be causing the problem.
3. Update the mouse driver. Go to the Device Manager, locate the mouse under “Mice and other pointing devices,” right-click it, and select “Update driver.”
4. Check for any misconfiguration in the mouse settings. Go to the Start Menu, type “mouse settings,” and select “Mouse settings” from the search results.
5. If you are using a wireless mouse, replace the batteries or charge it. Also, check if the receiver is properly connected to the PC.
6. If you have a Logitech wireless mouse, ensure that the receiver is securely attached and try re-pairing the mouse with the receiver.
7. Try connecting the mouse to a different USB port or using a different USB cable.
8. Restart your PC in BIOS mode and check if the mouse works. If it does, the issue might be related to your operating system or software.
9. Update your Windows 10 to the latest version. Microsoft often releases updates that fix common issues, including mouse problems.
10. If none of the above fixes work, consider using a different mouse to see if the problem is with the device itself.
11. If all else fails, contact Microsoft Support for further assistance.
Remember to always follow these steps carefully and ensure you have a backup of your important data before making any changes to your computer.
Running the Troubleshooter for Mouse Issues
1. Open the Start Menu Window and type “Troubleshoot” in the search bar.
2. Select “Troubleshoot settings” from the results.
3. Scroll down and click on “Additional troubleshooters” under the “Get up and running” section.
4. Locate and click on “Hardware and Devices” in the list of troubleshooters.
5. Click on “Run the troubleshooter” and follow the on-screen instructions.
6. The troubleshooter will scan for any issues with your mouse and attempt to fix them automatically.
7. If the troubleshooter is unable to resolve the problem, try the following steps:
– Check if the mouse is properly connected to the computer.
– Update the mouse driver by going to the manufacturer’s website or using Windows Update.
– Try using a different USB port or connecting the mouse via Bluetooth if applicable.
– Restart your computer and check if the mouse works.
8. If the issue persists, it may be necessary to seek further assistance or consider replacing the mouse.
Updating or Reinstalling Mouse Driver
If your USB mouse stops working on Windows 10, updating or reinstalling the mouse driver can often resolve the issue. Follow these steps:
1. Press Win + X and select Device Manager.
2. Expand the Mice and other pointing devices category.
3. Right-click on your mouse and select Update driver.
4. Choose Search automatically for updated driver software.
5. If Windows finds an updated driver, it will install it. Otherwise, proceed to the next step.
6. Right-click on your mouse again and select Uninstall device.
7. Restart your PC.
8. Windows will automatically reinstall the mouse driver.
If the issue persists, try using a different USB port or connecting the mouse to another computer to determine if the problem is with the mouse or the PC itself.
Remember to keep your drivers up to date and consider checking the manufacturer’s website for specific driver updates for your mouse model.
Disabling Fast Startup Option
To disable the Fast Startup option on Windows 10 and resolve issues with a USB mouse not working, follow these steps:
1. Press the Windows key + X and select “Power Options.”
2. In the Power Options window, click “Choose what the power buttons do” on the left side.
3. Click “Change settings that are currently unavailable.”
4. Scroll down to the “Shutdown settings” section and uncheck the box next to “Turn on fast startup.”
5. Click “Save changes” to apply the settings.
This will disable Fast Startup and help fix problems with the USB mouse. Restart your computer for the changes to take effect. Make sure your USB mouse is properly connected and try using it again.
If the issue persists, try the other fixes mentioned in the article.
Changing USB Power Management Settings
To change USB power management settings in Windows 10 and fix issues with your USB mouse, follow these steps:
1. Press the Windows key on your keyboard to open the Start Menu.
2. Type “Device Manager” and select it from the search results.
3. In the Device Manager window, expand the “Universal Serial Bus controllers” category.
4. Look for your USB mouse or device in the list. It may be listed as “HID-compliant mouse” or with the manufacturer’s name, such as “Logitech Mouse.”
5. Right-click on the USB mouse/device and select “Properties.”
6. In the Properties window, go to the “Power Management” tab.
7. Uncheck the box that says “Allow the computer to turn off this device to save power.”
8. Click “OK” to save the changes.
This will prevent Windows from powering off your USB mouse/device, which can cause it to stop working. Remember to restart your computer after making these changes for them to take effect.
Changing BIOS or UEFI Settings
To change BIOS or UEFI settings for fixing a Windows 10 USB mouse that stops working, follow these steps:
1. Restart your computer and press the designated key (usually Del or F2) to enter the BIOS or UEFI settings.
2. Navigate to the “Input” or “Devices” section using the arrow keys on your keyboard.
3. Look for a setting related to USB devices or keyboards/mice.
4. Enable the setting if it’s disabled or vice versa.
5. Save the changes and exit the BIOS or UEFI settings.
6. Wait for your computer to restart and check if the mouse is now working.
If the issue persists, try using a different USB port or connecting the mouse using Bluetooth if it supports it. You can also update the mouse driver in the Device Manager or try using a different mouse to isolate the problem.
Recovering Lost Data from Windows 10/11
Recovering Lost Data from Windows 10/11
If your USB mouse stops working on Windows 10/11, here are 11 fixes that can help you get it back up and running:
1. Check the USB connection: Ensure that the mouse is securely connected to the USB port on your computer.
2. Restart your computer: Sometimes a simple restart can resolve the issue.
3. Update mouse drivers: Go to the manufacturer’s website and download the latest drivers for your mouse.
4. Try a different USB port: Plug the mouse into a different USB port to rule out any issues with the port itself.
5. Check for Windows updates: Make sure your operating system is up to date, as updates often include bug fixes for hardware compatibility.
6. Run the Hardware and Devices troubleshooter: Press the Windows key + I, then go to “Update & Security” > “Troubleshoot” > “Hardware and Devices”.
7. Use the Device Manager to uninstall and reinstall the mouse drivers: Press the Windows key + X, then select “Device Manager”. Expand the “Mice and other pointing devices” category, right-click on your mouse, and select “Uninstall device”. Restart your computer to automatically reinstall the drivers.
8. Try a different mouse: If possible, test your computer with a different mouse to determine if the issue is with the mouse itself or the computer.
9. Check the mouse settings: Go to “Settings” > “Devices” > “Mouse” and ensure that the mouse settings are configured correctly.
10. Scan for malware: Run a full system scan using your preferred antivirus software to check for any malware that could be interfering with the mouse.
11. Perform a system restore: If all else fails, you can try restoring your computer to a previous point when the mouse was working fine.
Remember to back up your important data before attempting any fixes that involve system changes.
Common FAQs about USB Mouse Not Working
- Click on the Start button located in the bottom left corner of the screen.
- Select the Power option.
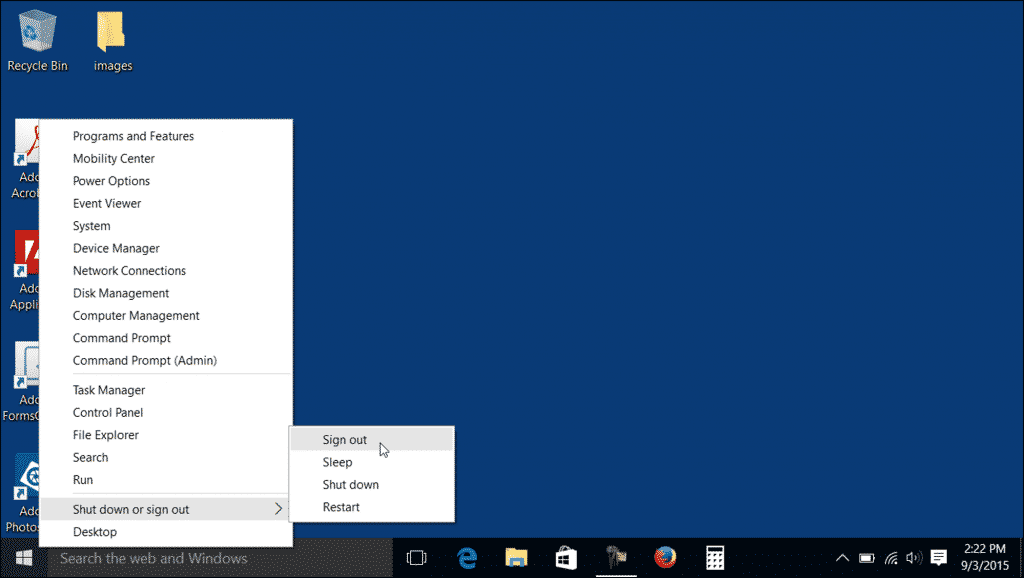
- Choose Restart from the drop-down menu.
Method 2: Check USB Connections
- Ensure that the USB mouse is properly connected to the computer.
- If using a USB hub, try connecting the mouse directly to a USB port on the computer.
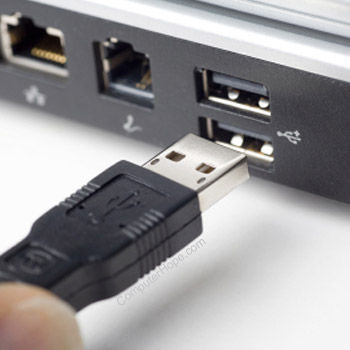
- Try using a different USB port to see if the issue persists.
Method 3: Update Mouse Drivers
- Press Windows Key + X and select Device Manager from the menu.
- Expand the Mice and other pointing devices category.
- Right-click on the USB mouse driver and select Update driver.
- Choose the option to Search automatically for updated driver software.

- Follow the on-screen instructions to complete the driver update process.
Method 4: Disable USB Selective Suspend
- Press Windows Key + X and select Power Options.
- Click on the Change plan settings link next to your windows-10-usb-mouse-stops-working/” title=”Windows 10 USB Mouse Stops Working [11 Best Fixes]”>selected power plan.
- Click on Change advanced power settings.
- Expand the USB settings category.

- Expand the USB selective suspend setting and set it to Disabled.
- Click Apply and OK to save the changes.
Method 5: Run Hardware and Devices Troubleshooter
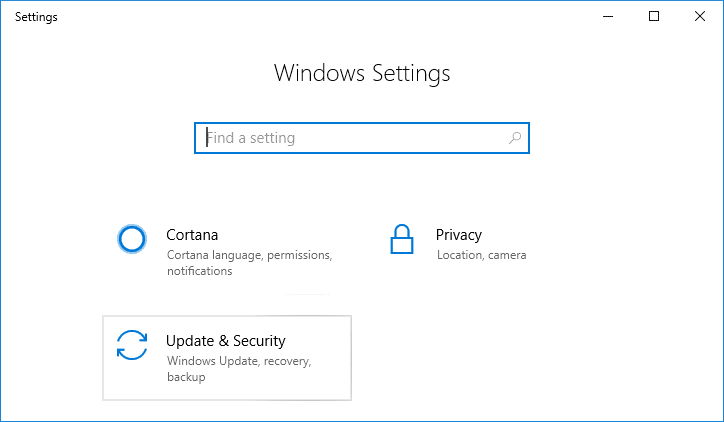
- Press Windows Key + I to open the Settings app.
- Click on Update & Security.
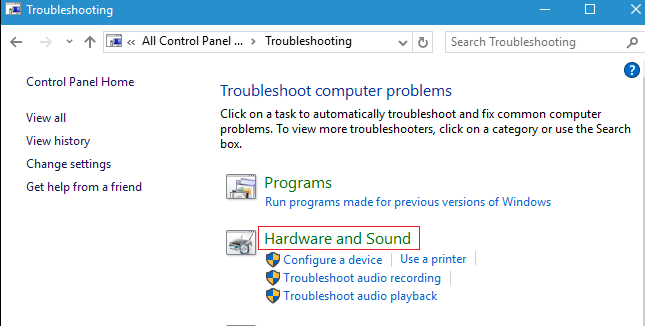
- Select the Troubleshoot tab from the left sidebar.
- Click on Additional troubleshooters.
- Scroll down and click on Hardware and Devices.
- Click Run the troubleshooter and follow the on-screen instructions.
Method 6: Disable Fast Startup
- Press Windows Key + X and select Power Options.
- Click on Choose what the power buttons do from the left sidebar.
- Click on Change settings that are currently unavailable.
- Uncheck the box next to Turn on fast startup (recommended).
- Click Save changes to apply the settings.
Method 7: Check for Windows Updates
- Press Windows Key + I to open the Settings app.
- Click on Update & Security.
- Click on Check for updates.
- If there are any updates available, click on Download and install.
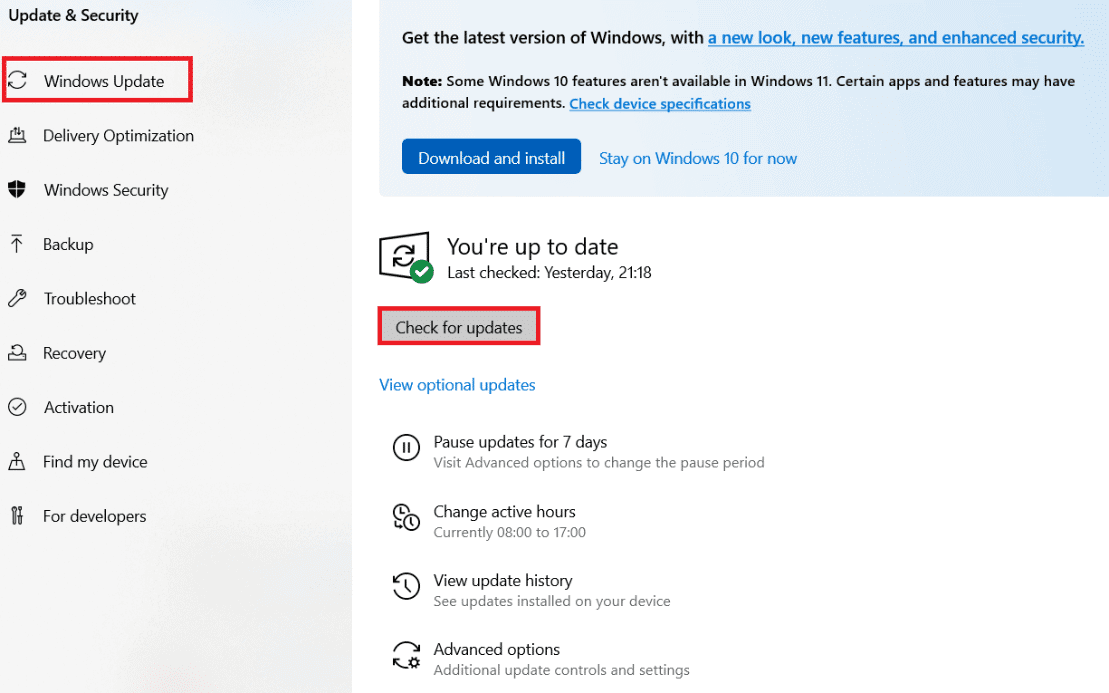
- Wait for the updates to be installed and restart the computer if prompted.
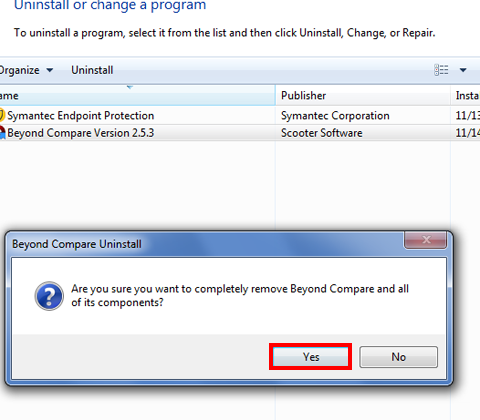
Method 8: Uninstall Recent Software or Updates
- Press Windows Key + X and select Apps and Features.
- Scroll through the list of installed programs and locate any recently installed software or updates.
- Select the program or update and click on Uninstall.
- Follow the on-screen instructions to remove the software or update.
Method 9: Perform System Restore
- Press Windows Key + X and select System.
- Click on System Protection from the left sidebar.
- Click on the System Restore button.
- Follow the on-screen instructions to choose a restore point and restore your system.
Method 10: Scan for Malware
- Open your preferred antivirus software.
- Click on the Scan or Scan for viruses option.
- Wait for the scan to complete and follow any prompts to remove any detected malware.
Method 11: Contact Technical Support
- If none of the above methods resolve the issue, it is recommended to contact the manufacturer’s technical support for further assistance.
Concluding Thoughts on Windows 10 USB Mouse Issues
Concluding Thoughts:
If you’re experiencing issues with your USB mouse on Windows 10, here are some of the best fixes to try.
First, make sure the mouse is securely connected to the USB port on your PC. If it’s a wireless mouse, check the batteries and ensure it’s properly paired.
Next, try updating the mouse driver. You can do this by going to the Device Manager, locating the mouse under “Mice and other pointing devices,” right-clicking on it, and selecting “Update driver.”
If that doesn’t work, try restarting your computer or reconnecting the mouse to a different USB port.
If all else fails, you can try troubleshooting the mouse using the built-in Windows Troubleshooter. Simply type “Troubleshoot” into the Start Menu search bar, select “Troubleshoot settings,” and follow the on-screen instructions.
Remember, these are just a few potential solutions, and the best fix may vary depending on the specific issue you’re facing.
